Why are homemade materials just as good if not better?
- Homemade physical activity equipment is easy on the budget. With a young child’s interests and needs changing quickly, making equipment at home with little to no cost makes it easier to keep equipment new and novel.
- Creativity and imagination become a big part of play. Because homemade equipment may not look exactly like what’s available in stores, children don’t have an automatic idea of how the equipment should be used. They can create their own games and uses!
- Families can make physical activity equipment from items they already have on-hand, making equipment easily accessible. This is great when friends and family come to play because more equipment can be made in an instant.
- Homemade equipment encourages both indoor and outdoor play so that children have opportunities to get active rain or shine.
- Just like purchased equipment, equipment that is homemade supports the development and practice of a variety of gross motor skills. The various textures, sizes and shapes of equipment also offer great opportunities for sensory exploration.
More Simple Ideas
Fabric Squares = Dancing Scarves (just hem the edges!)
Yarn = Ball
Socks = Ball
Crumpled Wrapping or Newspaper = Ball
Laundry Basket on Side = Soccer Goal
Laundry Basket Upright = Basketball Goal
Paper Plates = Skates (great on various surfaces!)
Plastic Bottles = Throwing Target
A Combination of Items = Obstacle Course
An Open Space = Dance Floor
Bubble Wrap = A Fun Jumping Surface!
Resources
- Healthy Moves from A to Z by Child Care Aware of Kansas
- Dr. Craft’s Active Play! by Dr. Diane Craft
- Purposeful Play: Early Childhood Movement Activities on a Budget by Renée McCall and Diane Craft
- Physical Activities and Healthy Snacks for Young Children by Team Nutrition Iowa
Do It Yourself Activity Instructions
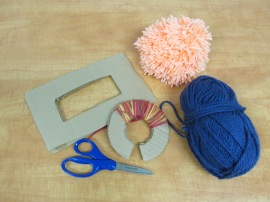
Create a yarn ball to take home, so that the fun in physical activity can start right away! Yarn balls are soft enough that they can be great for play indoors and outdoors. The texture also makes it easy to catch and great for sensory exploration.
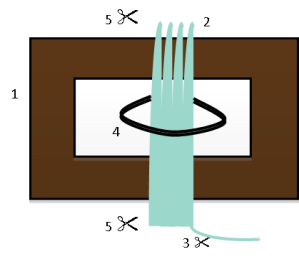
- Create a template by cutting a rectangle out of cardboard. The rectangle can be larger or smaller, depending on the size yarn ball you want. Then cut a smaller rectangle out of the middle.
- Begin to wind the yarn around the rectangle near the center of the shape across the longer sides of the template.
- When yarn has been thickly wrapped around the rectangle in just the one direction, cut the string of yarn from the remaining spool.
- Take a separate piece of yarn and fold it in half. Then, loop it through the sides of the internal hole of the rectangle and tightly tie it around all of the wound yarn, like a belt.
- Once tightly tied, cut the yarn at the two edges of the rectangle.
- Slide the yarn out from the middle of the rectangle. Tie a second string around the yarn ball, repeating step 4.
- Trim and fluff the yarn ball into a round shape!
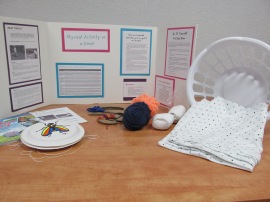
Materials for the Physical Activity on a Dime! Learning Center:
- Homemade Full Materials
- A Copy of Dr. Craft’s Active Play!
- Copies of Swat the Fly Handout
- Swat the Fly Example
- Half Pool Noodle
- Length of Bubble Wrap
- Yarn Ball Template(s)
- Yarn
- Sharp Scissors
- Yarn Ball Examples
- Sock Balls
- Laundry Basket
- Homemade Physical Activity Materials
Sources:
Coe, J. & Allsbrook, L. (1978). See How They Run: A Lesson Guide to Preschool Movement Education.
Craft, D. & Smith, C. (2008). Dr. Craft’s Active Play! Fun Physical Activities for Young Children.
Wisconsin Department of Public Instruction, Wisconsin Department of Health Services & Wisconsin Department of Children and Families. (2011). Active Early: A Wisconsin Guide to Improving Childhood Physical Activity.


